delete
LST – Light, Shape and Texture

LST – Light, Shape and Texture

LST – Light, Shape and Texture.    Subject: Wooden Spoon in Metal Can 

As a part of my Film Project, I shot this still life with 35mm film and small continuous lights. I enjoy creating black and white images with dramatic  lighting, with subjects that create shape and texture  that mix with the film grain.  Put all these attributes together and the image should be attractive and pleasing.  

Behind the photo:

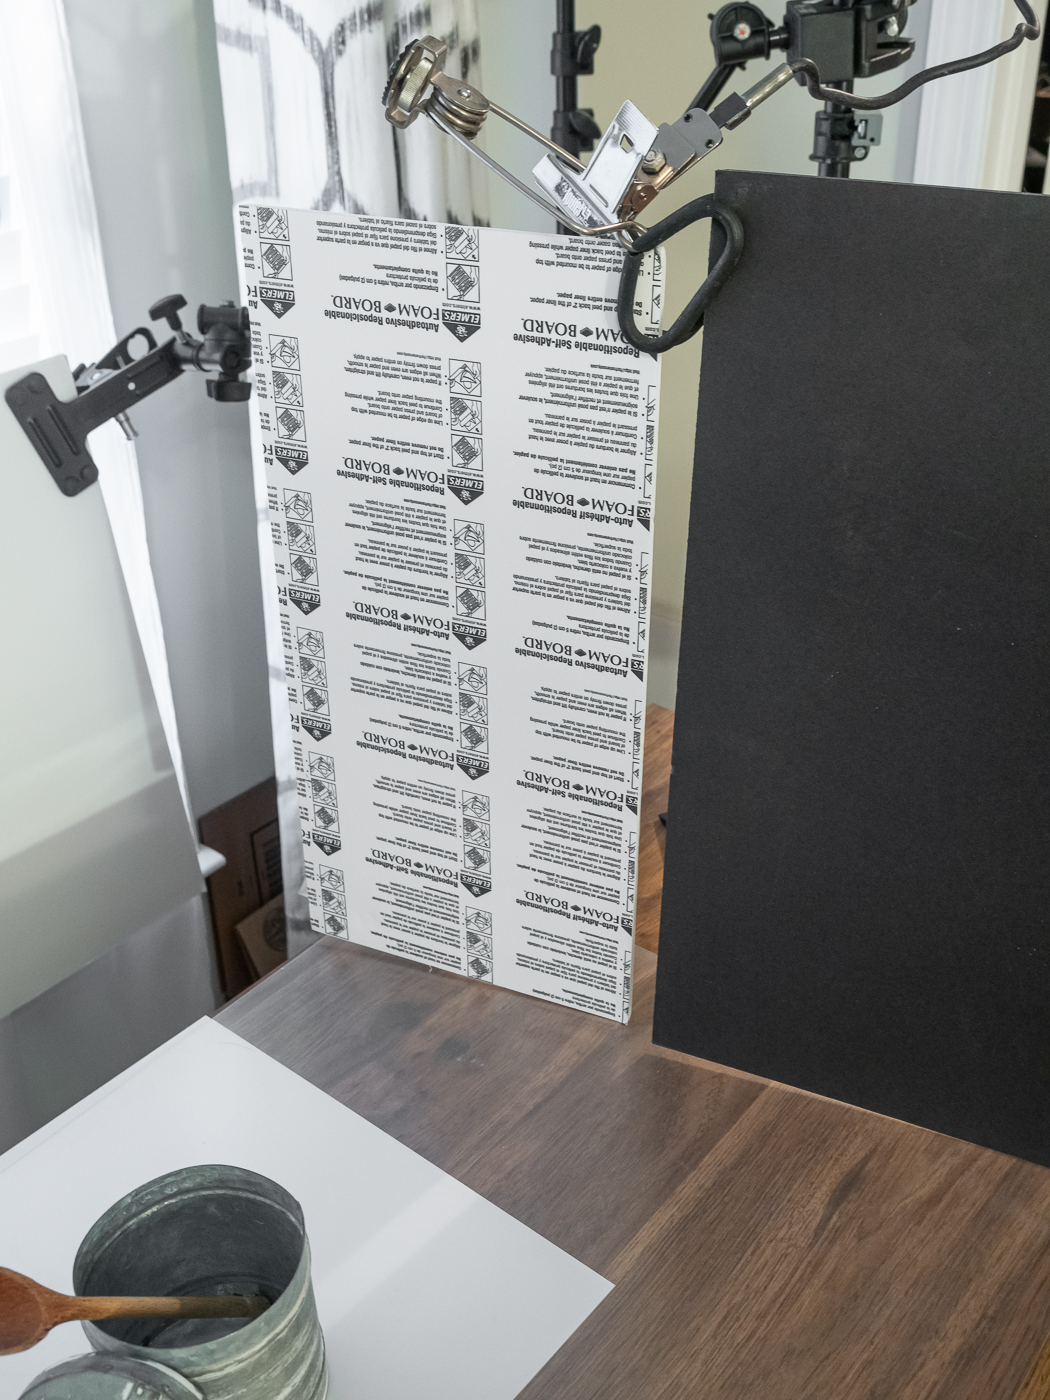
– The subject ( A ) is a retro metal container with the lid leaning and an old wooded spoon standing up.

– The set was a raised wood grain desk top covered with non glare plastic sheet   ( B ) for its reflective properties.  

– The background is a white poster board ( C ) lit with a 2 x 3-1/2 inch LED LumeCube Panel Mini light ( G ) from below the raised table surface.

– The key light is a 2 x 2 “ LumeCube V2.0 LED light ( F ).  Two vertical poster boards ( E ) create a slit for this key light to create a streak of light onto the subject with a Light Right* silver reflector ( D ) returns some light from the opposite side.  

This was shot with an Olympus OM4Ti on a tripod with a 85mm lens, HP5+ black & white film at ISO 200, processed in Rodinal developer 1:50 at 68 degrees for 10-1/2 minutes.  A Nikon D850 and its ES-2 attachment was used to scan the negatives.  Final adjustments to tone and contrast etc. was done in Lightroom.

This image is slated to go into Fine Arts America and possibly to someone’s wall!   Contact me if this image is of interest to you or if you wish to discuss technique.

delete
LONLEY HOUSE

LONLEY HOUSE

Lonely House – Behind The Photo

In the lower Catskills, NY circa 1976, I came upon this unique farmhouse. The house had a door and a window on the front and this side view sports a single window. The overcast sky crated the void that makes the house stand out even more. An important aspect of this photo is this is a very early photo taken in the infancy of my photo career. Taken with a Miranda Sensorex camera, my first SLR, and with a cheap lens. From an early enlargement that was squirreled away, a digital copy was created and enhanced to the state is is now. Also see the other versions of this shot – Sepia, God Bless Our Home, and Storm.  A humble home with a humble message – So blessings to you, your loved ones and comfortable home.

delete
LESSONS FROM THE WAY BACK MACHINE

LESSONS FROM THE WAY BACK MACHINE

Annual Report – Engineering.

This image illustrates two techniques that helped make an effective story telling image.

This location was very cluttered and messy. This is a common problem for location assignments, so try using a telephoto angle of view to eliminate the mess.  Additionally,  using a silhouette for one of the elements in the story can add to the overall effect of the image.

I started by identifying the visual elements of the story – arranging the elements with a telephoto angle of view to eliminate the mess and dirty clutter.

Next was to light the scene without showing any clutter. Lighting the engineer, the circuit board and antenna was first. A rear kicker light was added to the engineer for separation from the background. The subject of the testing was a large-scale object in the back. I decided not to light the object, but lit the walls behind it to create a silhouette. The engineer and the testing remained the prominent message.

Granted, the craft of photography (creating the view and lighting) can be time consuming. You must be mindful of the message and the reason for the image. You must create the mood and image quality that available light photography would never be able to match.

This image was created for an anniversary, retro issue report, captured with a Hasselblad and roughly 4000 watt seconds of flash power. All images were converted to black and white.  Nowadays, this could be executed with a high resolution DSLR, with a higher ISO and smaller lights. But, the concepts and techniques would be the same.


Gear:  Hasselblad, DynaLite and Norman flash.

delete
A Dual Use

A Dual Use

This was an accidental discovery that adds versatility to your Chimera beauty dish–  and getting more use from the same piece of gear is always a welcome benefit.  The transition of the collapsible beauty dish is shown here on a DynaLite Baja monolight.

The discovery happened during the disassembly of the beauty dish — when I removed 2 poles and then the opposing 2 poles, producing the strip configuration (photo #6).

It ain’t pretty and that’s ok, it produces another shape of light that makes this a versatile tool.

Here’s another solution, using this unit a a beauty dish, I often use the front diffusion on the bottom half only (photo #4)  to feather and reduce the light on the lower area of my subject.  This works great for your portrait subjects. 

I am always looking to create more utility from existing light sources.  This one is a great duality from a single light source.  I hope you find this helpful.  

Please follow Old Tricks For New Dogs for more creative solutions…..

Gear:  DynaLite Baja and Chimera 24″ Beauty Dish.
delete
Soft Light and Dynamic Color

Soft Light and Dynamic Color

Colorful Flowers – Soft Indirect Lighting set.

I learned this technique from a Nancy Brown book, Photographing People for Advertising. Nancy used this lighting to create intense color in a shot of people with colorful attire.

I incorporated this technique for my “food store flowers”, a perfect lighting technique for this subject.

All light coming from behind the subject was blocked by the black formica behind the flowers and the V-flats around the set. The camera shot through the small slit opening in the V-flats. The interior of the V-flats were white fabric to let the light “fall” onto the flowers.


Photo Progression

  1. start
  2. background light bouncing off of the white seamless
  3. added a 6×6 frame with diffusion to spread light – this and previous step to spread light with minimum distance
  4. black formica as background for flowers and a rig to hold the flower bouquet
  5. almost ready to shoot – add the flowers and close the front of the V-flats for a narrow opening to shoot through

Gear:
DynaLite Lighting, Chimera Panels and Frames for the V-flats and 6×6 diffusion panel, Olympus cameras and the flowers were from Safeway!

delete
Light Masking

Light Masking

Light Masking or a tale of three maskings.

Masking subjects for replacing the background can be very tedious.  As a photographer, you could leave that task for the graphic artist.  But if you, the photographer, supply the files with perfect clipping paths, you become a more valuable part of the creative team.

The masking challenges:

Subject 1–  stuffed animal with a feather – feather with delicate wisps.

L to R:  The set up on glass lets light show through all around subject  —  Main exposure for subject  —  Background exposure for mask  —  processed mask ready for Photoshop process.

Subject 2–  lantern – a subject with transparency

We want the background to come through the transparent areas and keep the inside and globe surface detail.

Here are some options.

Subject 3-  a location and studio shoot  –  This location shoot was canceled due to snow.

To complete this for a deadline,  I shot the skate park a day earlier than the snow fall and two days later, I shot the skate boarder in the studio.  With masking, we put this all together.

The Process

I have been using the Hensel FreeMask radio triggers on my Dynalite power packs for executing the two lighting exposures in this process.  They fire almost simultaneously.  Lighting is divided into, first for the subject, and then instantly the background.  You need the Hensel radios for this, especially for human subjects (camera set for minimum of 6 frames per second – 10 frames is better).  The two frames are processed in Photoshop.  See details at the links below.

Hensel linkhttps://www.youtube.com/watch?v=UyfmAAfuf3o

The Processhttps://youtu.be/JdY_4-xhRs0

CAMERA- Olympus M1, LIGHTS- DynaLite,  RADIO TRIGGERING- Hensel Free Mask

delete
Cross Polarize

Cross Polarize

Cross Polarization of Plastic – Magic

I learned this way back at the beginning of my career, from a very technical photographer and one of the original Harmonicats – (goes back to the old Ed Sullivan Show days – look them up!).

This technique, I was told, is a way to check stress in plastic manufacturing. I adopted it as a creative tool.

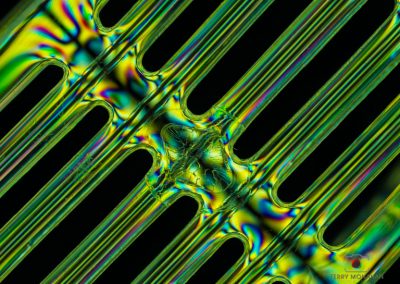
The set up is a gel polarizing filter on a light box or light source. Position the plastic subject between your camera and the light. Add the polarizer filter on your lens and rotate until all the light from the source goes black. The light coming through the plastic gives you the magic swirls of color. I’ve used this on assignments as well as stock illustrations.  Great unique look and you always get asked, How did you do that!

delete
Repurpose HDR

Repurpose HDR

HDR Re-Purposed
Popular now, is the long exposures to smooth motion in water, clouds, etc. This is a good technique via tripod, heavy ND filter and very long exposures. An alternative to long exposures is taking multiple exposures using HDR (High Dynamic Range) and processing into one image. The effect is not better nor worse – only a bit different.

1. Flag in Wing
First, here’s to all those who serve, and have served our country. To create the multiple positions of the flag in the wind, the camera was set on a tripod and multiple exposures mere made for HDR (high dynamic range). Knowing that the flag positions would not line up and register, this created my intended vision.
After processing the HDR image, the background colors were desaturated to bring the emphasis to the colors in the flag. This was a unique re-purposing of HDR.

2. Peanut Warehouse and the Sky
In the old warehouse shot, HDR was purposed for the high dynamic range and with the slower shooting in manual, the clouds showed movement. Here we achieved a dual effect, the high dynamic range in the photo as well as movement in the clouds.

delete
QCC Quick Contrast

QCC Quick Contrast

QCC — Quick Contrast Control

“How To Change the Contrast On Your Subject In Two-Seconds!”

Here is a fast and efficient method of controlling contrast using a shoot through panel (this one is from Chimera).

Our assignment is to shoot an environmental portrait in a work place.  We position a 42×42″ frame with a standard diffusion for a “shoot-through” main light.

The subject is seated on the edge of a desk, a window view in the back ground and the panel frame in position for the key light plus another panel with silver reflective panel as a fill reflector.

The top row shows a Hensel monolight strobe at a distance from our panel frame, filling the diffusion panel evenly to produce a soft wrap of light around our subjects face.

Then in seconds we can change the contrast on our subject (bottom row) by moving the strobe closer to the panel frame creating a small concentrated spot of light on the panel and Viola – we have changed the contrast without any major effort. We never had to move the panel. Now make a quick adjustment to your exposure or power down the flash.

Tips on Exposure:  in the above examples, the camera exposure was changed in the higher contrast image and the background went darker.  To keep the background the same density as in the first mage, the power of the strobe could have been reduced so to maintain the same exposure.  Either way works, it is just a matter of how you want your background to look.

Gear:  Hensel Flash and Chimera Panel/Frames.

delete
High Key Set

High Key Set

VARIATION -LIGHTING HIKEY SET
This is my variation on lighting the background for high-key portraits.
Most solutions I’ve seen others use to light the background, requires two lightbanks or strip lights. I eliminated these two modifiers and made the V-flats do both – light the background and control the “spill-around” light coming from the background.
The V-flats I use are the Chimera Panel Frames with the elastic corners on the interchangeable fabrics. Each V-flat uses a Black/White and a Black/Silver panel. The diagram shows the arrangement in relation to the light source. Ah, the light source … a pair of DynaLite bare bulb flash heads bouncing off the back sides of the V-flats.
I came up with this to be able to set this up in smaller areas. The Lightbanks take up considerably more room.
FYI – The key light here was a three-foot Octabank.

See diagram below…

Gear:  Nikon D750, Sigma 24-105, DynaLight M1000 packs, 4040 and NE1 heads plus Chimera Beauty Dish.

delete
Hero Bike

Hero Bike

Motorcycle Hero Shot – trade show displays
This red Yamaha sport bike has an interesting look when viewed from an elevated high frontal position. It reminded me of a space alien with big eyes.  This motorcycle was mounted on a rolling platform.  The base of the platform was covered with diamond plate steel which has a great texture and is a part of the automotive community.
The first decision was to shoot from the high frontal angle and to include the diamond plate as the background.  The second thought process was about lighting the the background diamond plate.  What if the diamond plate was also red — here we go.

The BackgroundLighting:  The solution was to roll the bike and platform into a corner of the show room in front of clean neutral colored walls. Then two DynaLite flash heads were pointed into the walls, one on each side of the motorcycle.  Both flash heads were equipped with red gels. I carry 4 sets of lighting gels on location – diffusion, neutral density, color conversion and color effects.  This lighting was bounced off the wall to illuminate the diamond plate and the exposure had to be adjusted to match the main light on the front of the motorcycle.

The Main Light:  I travel with a Bogen / Manfrotto 3-piece location boom and used one section of the boom to be able to put my DynaLite flash head directly over the camera, centered to the front of the motorcycle.  The motorcycle is a highly reflective subject which would normally require a very large light source – impractical in my situation.  A flash head alone, a very small source, can illuminate the front of the motorcycle producing a very small highlight that is not intrusive. I left the highlight in the shot, but it could have been retouched out in post.

In this stylized shot, two different reflective surfaces were lit to enhance and balance the subject and background with similar color.

Sign up for future “Old Tricks For New Dogs” blogs.

delete
Location Light Table

Location Light Table

As I look back at a past lighting/rigging solution, this topic covers a translucent subject (petri dishes) requiring light from below as well as from above.  Some used to call this “Hamburger Lighting”.

While shooting an annual report,  a topic on the shot list centered around growing cultures in petri dishes.  Spreading two tables apart in a meeting room and suspending a lighting grid (from the overhead fluorescent fixture) between two tables , I then slid a Lightbank under to create the light needed to come through the transparent petri dishes.

Two top lights were, a weak light bounced from the ceiling and a glancing accent light going across the subject from a low angle.

I wanted a lot of drama so used the “Less is More” idea, got close to a few petri dishes with the perspective of a wide angle lens.  Locations can offer unique opportunities for creative solutions!


Olympus OM1  //  21mm  //  Wafer Light Bank // Tmax Film  // For:  for Rutgers’ Waksman Institute Annual Report.